Mod制作日記 - 準備
目次 (折りたたみ可)
環境
Minecraftのバージョン: v1.20.1
Forgeのバージョン: 47.3.0
JDKのバージョン: 17?
IDE: Visual Studio Code
以降、Visual Studio Code のことをVSCodeと呼びます。
制作の準備
Mdkのダウンロード
Forgeの公式サイトからダウンロードします:
Minecraft Forge downloads
Downloads for Minecraft Forge for Minecraft 1.20.1
Recommended: 47.3.0
Latest: 47.3.12
Latest(最新)ではなく、Recommended(推奨)のMdkをダウンロードします。
Mdkのところをクリックすると広告が出るんですが、数秒待って右上の「SKIP」をクリックすると先に進めます。
Mdkの展開
整理の意味も込めて、Mod作成に使う作業ディレクトリを決めます。今回は「my_mod」フォルダにしています。
(作業フォルダ)
┣ gradle
┣ src
┣ .gitattributes
┣ .gitignore
┣ build.gradle
┣ changelog.txt
┣ CREDITS.txt
┣ gradle.properties
┣ gradlew
┣ gradlew.bat
┣ LICENSE.txt
┣ README.txt
┗ settings.gradle
不要なファイルの削除
以下のファイルは消します。このテンプレートに対するもので、これから作るModには関係ないからです。
- changelog.txt
- CREDITS.txt
- LICENSE.txt
- README.txt
VSCodeの準備
作業フォルダをVSCodeのワークスペースにした後、「Extension Pack fo Java」という拡張機能をインストールしました。 Javaの開発、なんなら今回のMod制作に必要なものもすべて入っています。
Extension Pack for Java - Visual Studio Marketplace
Extension for Visual Studio Code - Popular extensions for Java development that provides Java IntelliSense, debugging, testing, Maven/Gradle support, project management and more
インストールした後はVSCodeを再起動します。
パーチメントの適用
以下のサイトの手順に従ってパーチメントを適用します。
Getting Started
## Choose a version Parchment mappings are provided in [three flavors][exports-info], but most users will only really need to use the _release_ exports. The latest version of the release export for a particular Minecraft version can be found in the version badges, which are present in the README of each...
①「(作業フォルダ)/settings.gradle」ファイルでrepositoriesフィールドを見つけて、以下の行を追加します。
pluginManagement {
    repositories {
        gradlePluginPortal()
        maven {
            name = 'MinecraftForge'
            url = 'https://maven.minecraftforge.net/'
        }
        maven { url = 'https://maven.parchmentmc.org' } // この行
    }
}

plugins {
    id 'org.gradle.toolchains.foojay-resolver-convention' version '0.7.0'
}
② 次は「(作業フォルダ)/build.gradle」ファイルでpluginsフィールドを見つけて、以下の行を追加します。
plugins {
    id 'eclipse'
    id 'idea'
    id 'maven-publish'
    id 'net.minecraftforge.gradle' version '[6.0,6.2)'
    id 'org.parchmentmc.librarian.forgegradle' version '1.+' // この行
}
③ 同じファイルで、今度はminecraftフィールドの以下の項目を見つけて、編集します。 mappings channelを'parchment'に、 versionを'2023.09.03-1.20.1'にします。
versionの数値は、上記サイトの「Choose a version」の章にある、バージョンの表をもとにしています。
minecraft {
  mappings channel: 'parchment', version: '2023.09.03-1.20.1'
}
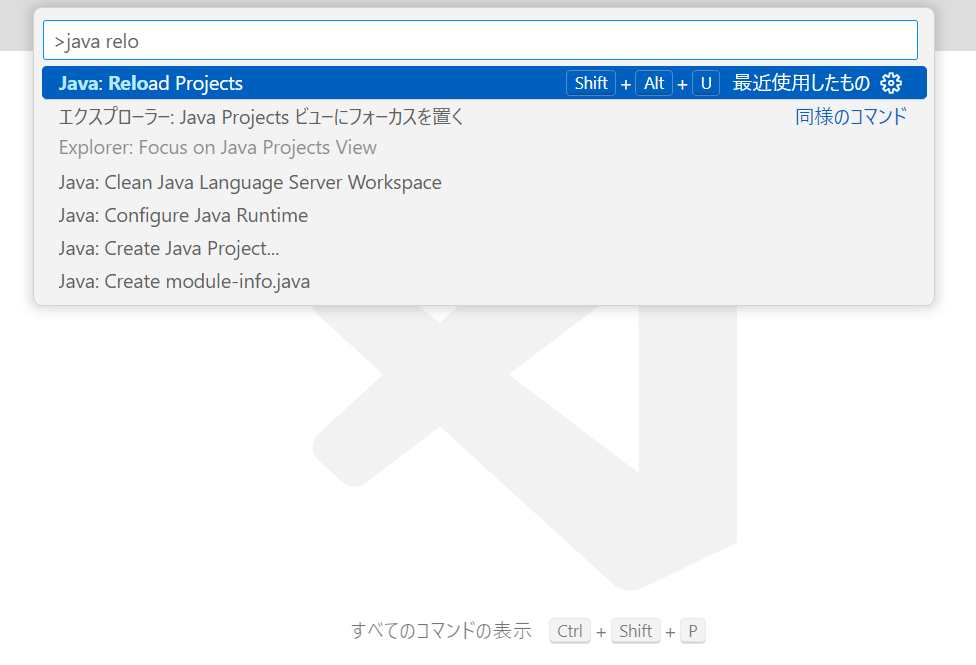
これらの値を変更したら、VSCodeで「表示 > コマンドパレット > Java: Reload Projects」でプロジェクトをリロードしておきます。
バッチファイルの作成・実行
作業フォルダに以下のコマンドが中身のバッチファイルを作成します。
gradlew genVSCodeRuns
VSCodeからファイルを新規作成すると楽。 ファイルの名前は自由なので、「setup.bat」とかにしました。
できたバッチファイルをエクスプローラからダブルクリックで実行して、長くて10分ぐらいでセットアップが完了します。
マイクラを起動
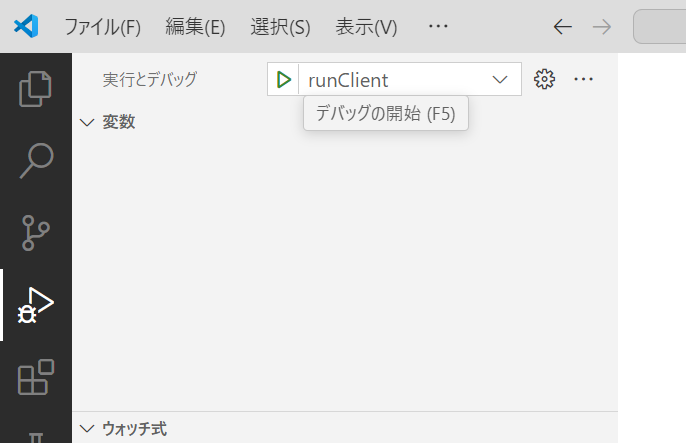
VSCodeで「実行とデバッグ」を開いて、上のほうにある選択肢が「runClient」になっていることを確認してから三角のボタンを押します。
起動できたらセットアップは成功! 確認だけなので起動した後は一旦閉じます。
豆知識
セーブデータ
デバッグ用のマイクラのセーブデータは「(作業フォルダ)/run」の中にあります。 「run/resourcepacks」にリソースパック、「run/mods」に他のModを追加することができる──といったように、マイクラのセーブデータそのままです。
ゲーム内設定
これはMod制作に限らず、マイクラJE全体に関する豆知識なのですが「(作業フォルダ)/run/options.txt」にゲーム内の設定が保存されています。 普段プレイしているマイクラのセーブデータからコピーして上書きすれば、一瞬で普段のプレイと同じ設定にできるというわけです。
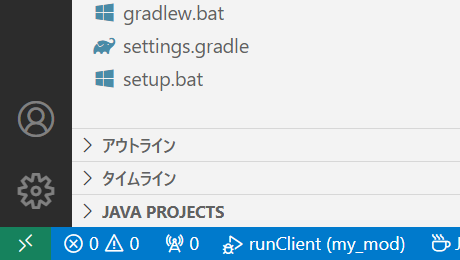
ここでまたプロジェクトをリロードしたほうがいいかもしれないです。 VSCodeのエクスプローラの下に「JAVA PROJECTS」があってほしいのに、このとき表示されてませんでした......。
いちおう以下の通知がでてきたら消してください。 Enable(有効)にすると色々うるさくなって、Disable(無効)にするとそれはそれで何か困りそうなので、無視しておきます(設定で変えられるけど)。
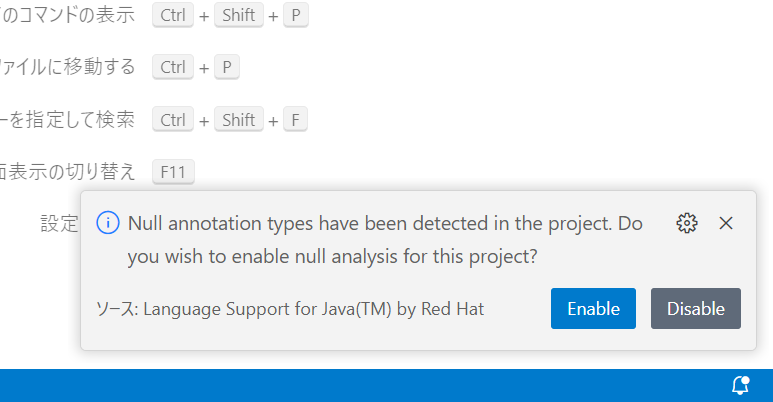
Null annotation types have been detected in the project. Do you wish to enable null analysis for this project?
(プロジェクト内でNullアノテーションの使用が検知されました。Null解析を有効にしますか?)
Modの基礎部分
これから作るModの根幹となるファイルを「(作業フォルダ)/src/main/java/com/example/examplemod/ExampleMod.java」を編集して作ります。
パッケージ名の編集
VSCodeの左のエクスプローラからフォルダの名前を変更します。「java/com/example/examplemod」の「example」と「examplemod」をクリックで選択してF2で変更します。 名前を変えるときは何でもF2。
「java/com/(作者名)/(ModのID)」がよくある形式ということで、今回は「java/com/masuec/my_mod」にしています。
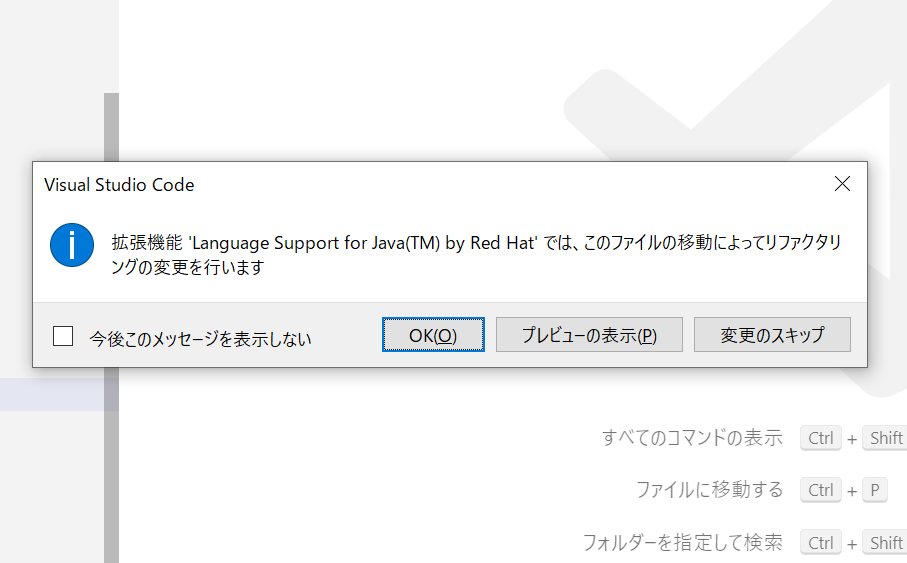
リファクタリングは、他の関係あるところを自動で書き換えてくれます。必ず「OK」!
メインクラスの編集
「ExampleMod.java」もF2で名前を変更します。「MyMod.java」にしておきました。
package com.masuec.my_mod;

import org.slf4j.Logger;

import com.mojang.logging.LogUtils;

import net.minecraftforge.api.distmarker.Dist;
import net.minecraftforge.common.MinecraftForge;
import net.minecraftforge.event.BuildCreativeModeTabContentsEvent;
import net.minecraftforge.event.server.ServerStartingEvent;
import net.minecraftforge.eventbus.api.IEventBus;
import net.minecraftforge.eventbus.api.SubscribeEvent;
import net.minecraftforge.fml.ModLoadingContext;
import net.minecraftforge.fml.common.Mod;
import net.minecraftforge.fml.config.ModConfig;
import net.minecraftforge.fml.event.lifecycle.FMLClientSetupEvent;
import net.minecraftforge.fml.event.lifecycle.FMLCommonSetupEvent;
import net.minecraftforge.fml.javafmlmod.FMLJavaModLoadingContext;

@Mod(MyMod.MODID)
public class MyMod {
  public static final String MODID = "my_mod"; // ModのID
  private static final Logger LOGGER = LogUtils.getLogger();

  public MyMod() {
    IEventBus modEventBus = FMLJavaModLoadingContext.get().getModEventBus();

    modEventBus.addListener(this::commonSetup);

    MinecraftForge.EVENT_BUS.register(this);

    ModLoadingContext.get().registerConfig(ModConfig.Type.COMMON, Config.SPEC);
  }

  private void commonSetup(final FMLCommonSetupEvent event) {

  }

  @SubscribeEvent
  public void onServerStarting(ServerStartingEvent event) {

  }

  @Mod.EventBusSubscriber(modid = MODID, bus = Mod.EventBusSubscriber.Bus.MOD, value = Dist.CLIENT)
  public static class ClientModEvents {
    @SubscribeEvent
    public static void onClientSetup(FMLClientSetupEvent event) {

    }
  }
}
編集前
package com.masuec.my_mod;

import com.mojang.logging.LogUtils;
import net.minecraft.client.Minecraft;
import net.minecraft.core.registries.Registries;
import net.minecraft.world.food.FoodProperties;
import net.minecraft.world.item.BlockItem;
import net.minecraft.world.item.CreativeModeTab;
import net.minecraft.world.item.CreativeModeTabs;
import net.minecraft.world.item.Item;
import net.minecraft.world.level.block.Block;
import net.minecraft.world.level.block.Blocks;
import net.minecraft.world.level.block.state.BlockBehaviour;
import net.minecraft.world.level.material.MapColor;
import net.minecraftforge.api.distmarker.Dist;
import net.minecraftforge.common.MinecraftForge;
import net.minecraftforge.event.BuildCreativeModeTabContentsEvent;
import net.minecraftforge.event.server.ServerStartingEvent;
import net.minecraftforge.eventbus.api.IEventBus;
import net.minecraftforge.eventbus.api.SubscribeEvent;
import net.minecraftforge.fml.ModLoadingContext;
import net.minecraftforge.fml.common.Mod;
import net.minecraftforge.fml.config.ModConfig;
import net.minecraftforge.fml.event.lifecycle.FMLClientSetupEvent;
import net.minecraftforge.fml.event.lifecycle.FMLCommonSetupEvent;
import net.minecraftforge.fml.javafmlmod.FMLJavaModLoadingContext;
import net.minecraftforge.registries.DeferredRegister;
import net.minecraftforge.registries.ForgeRegistries;
import net.minecraftforge.registries.RegistryObject;
import org.slf4j.Logger;

// The value here should match an entry in the META-INF/mods.toml file
@Mod(MyMod.MODID)
public class MyMod
{
    // Define mod id in a common place for everything to reference
    public static final String MODID = "examplemod";
    // Directly reference a slf4j logger
    private static final Logger LOGGER = LogUtils.getLogger();
    // Create a Deferred Register to hold Blocks which will all be registered under the "examplemod" namespace
    public static final DeferredRegister<Block> BLOCKS = DeferredRegister.create(ForgeRegistries.BLOCKS, MODID);
    // Create a Deferred Register to hold Items which will all be registered under the "examplemod" namespace
    public static final DeferredRegister<Item> ITEMS = DeferredRegister.create(ForgeRegistries.ITEMS, MODID);
    // Create a Deferred Register to hold CreativeModeTabs which will all be registered under the "examplemod" namespace
    public static final DeferredRegister<CreativeModeTab> CREATIVE_MODE_TABS = DeferredRegister.create(Registries.CREATIVE_MODE_TAB, MODID);

    // Creates a new Block with the id "examplemod:example_block", combining the namespace and path
    public static final RegistryObject<Block> EXAMPLE_BLOCK = BLOCKS.register("example_block", () -> new Block(BlockBehaviour.Properties.of().mapColor(MapColor.STONE)));
    // Creates a new BlockItem with the id "examplemod:example_block", combining the namespace and path
    public static final RegistryObject<Item> EXAMPLE_BLOCK_ITEM = ITEMS.register("example_block", () -> new BlockItem(EXAMPLE_BLOCK.get(), new Item.Properties()));

    // Creates a new food item with the id "examplemod:example_id", nutrition 1 and saturation 2
    public static final RegistryObject<Item> EXAMPLE_ITEM = ITEMS.register("example_item", () -> new Item(new Item.Properties().food(new FoodProperties.Builder()
            .alwaysEat().nutrition(1).saturationMod(2f).build())));

    // Creates a creative tab with the id "examplemod:example_tab" for the example item, that is placed after the combat tab
    public static final RegistryObject<CreativeModeTab> EXAMPLE_TAB = CREATIVE_MODE_TABS.register("example_tab", () -> CreativeModeTab.builder()
            .withTabsBefore(CreativeModeTabs.COMBAT)
            .icon(() -> EXAMPLE_ITEM.get().getDefaultInstance())
            .displayItems((parameters, output) -> {
                output.accept(EXAMPLE_ITEM.get()); // Add the example item to the tab. For your own tabs, this method is preferred over the event
            }).build());

    public MyMod()
    {
        IEventBus modEventBus = FMLJavaModLoadingContext.get().getModEventBus();

        // Register the commonSetup method for modloading
        modEventBus.addListener(this::commonSetup);

        // Register the Deferred Register to the mod event bus so blocks get registered
        BLOCKS.register(modEventBus);
        // Register the Deferred Register to the mod event bus so items get registered
        ITEMS.register(modEventBus);
        // Register the Deferred Register to the mod event bus so tabs get registered
        CREATIVE_MODE_TABS.register(modEventBus);

        // Register ourselves for server and other game events we are interested in
        MinecraftForge.EVENT_BUS.register(this);

        // Register the item to a creative tab
        modEventBus.addListener(this::addCreative);

        // Register our mod's ForgeConfigSpec so that Forge can create and load the config file for us
        ModLoadingContext.get().registerConfig(ModConfig.Type.COMMON, Config.SPEC);
    }

    private void commonSetup(final FMLCommonSetupEvent event)
    {
        // Some common setup code
        LOGGER.info("HELLO FROM COMMON SETUP");

        if (Config.logDirtBlock)
            LOGGER.info("DIRT BLOCK >> {}", ForgeRegistries.BLOCKS.getKey(Blocks.DIRT));

        LOGGER.info(Config.magicNumberIntroduction + Config.magicNumber);

        Config.items.forEach((item) -> LOGGER.info("ITEM >> {}", item.toString()));
    }

    // Add the example block item to the building blocks tab
    private void addCreative(BuildCreativeModeTabContentsEvent event)
    {
        if (event.getTabKey() == CreativeModeTabs.BUILDING_BLOCKS)
            event.accept(EXAMPLE_BLOCK_ITEM);
    }

    // You can use SubscribeEvent and let the Event Bus discover methods to call
    @SubscribeEvent
    public void onServerStarting(ServerStartingEvent event)
    {
        // Do something when the server starts
        LOGGER.info("HELLO from server starting");
    }

    // You can use EventBusSubscriber to automatically register all static methods in the class annotated with @SubscribeEvent
    @Mod.EventBusSubscriber(modid = MODID, bus = Mod.EventBusSubscriber.Bus.MOD, value = Dist.CLIENT)
    public static class ClientModEvents
    {
        @SubscribeEvent
        public static void onClientSetup(FMLClientSetupEvent event)
        {
            // Some client setup code
            LOGGER.info("HELLO FROM CLIENT SETUP");
            LOGGER.info("MINECRAFT NAME >> {}", Minecraft.getInstance().getUser().getName());
        }
    }
}
TOMLファイルの編集
「(作業フォルダ)/src/main/resources/META-INF/mods.toml」の内容も編集します。
modLoader="javafml"
loaderVersion="[47,)"
license="All rights reserved"

[[mods]]
modId="my_mod"
version="1.0"
displayName="My Mod"
authors="Masuec"
description='''
My test Mod
日本語でもOK
'''
modLoader="javafml"
loaderVersion="[47,)"
license="All rights reserved"

[[mods]]
modId="(ModのID)"
version="1.0"
displayName="(表示するMod名)"
authors="(作者名)"
description='''
(Modの説明文)
(改行できる)
'''
編集前
# This is an example mods.toml file. It contains the data relating to the loading mods.
# There are several mandatory fields (#mandatory), and many more that are optional (#optional).
# The overall format is standard TOML format, v0.5.0.
# Note that there are a couple of TOML lists in this file.
# Find more information on toml format here:  https://github.com/toml-lang/toml
# The name of the mod loader type to load - for regular FML @Mod mods it should be javafml
modLoader="javafml" #mandatory
# A version range to match for said mod loader - for regular FML @Mod it will be the forge version
loaderVersion="${loader_version_range}" #mandatory This is typically bumped every Minecraft version by Forge. See our download page for lists of versions.
# The license for you mod. This is mandatory metadata and allows for easier comprehension of your redistributive properties.
# Review your options at https://choosealicense.com/. All rights reserved is the default copyright stance, and is thus the default here.
license="${mod_license}"
# A URL to refer people to when problems occur with this mod
#issueTrackerURL="https://change.me.to.your.issue.tracker.example.invalid/" #optional
# A list of mods - how many allowed here is determined by the individual mod loader
[[mods]] #mandatory
# The modid of the mod
modId="${mod_id}" #mandatory
# The version number of the mod
version="${mod_version}" #mandatory
# A display name for the mod
displayName="${mod_name}" #mandatory
# A URL to query for updates for this mod. See the JSON update specification https://docs.minecraftforge.net/en/latest/misc/updatechecker/
#updateJSONURL="https://change.me.example.invalid/updates.json" #optional
# A URL for the "homepage" for this mod, displayed in the mod UI
#displayURL="https://change.me.to.your.mods.homepage.example.invalid/" #optional
# A file name (in the root of the mod JAR) containing a logo for display
#logoFile="examplemod.png" #optional
# A text field displayed in the mod UI
#credits="" #optional
# A text field displayed in the mod UI
authors="${mod_authors}" #optional
# Display Test controls the display for your mod in the server connection screen
# MATCH_VERSION means that your mod will cause a red X if the versions on client and server differ. This is the default behaviour and should be what you choose if you have server and client elements to your mod.
# IGNORE_SERVER_VERSION means that your mod will not cause a red X if it's present on the server but not on the client. This is what you should use if you're a server only mod.
# IGNORE_ALL_VERSION means that your mod will not cause a red X if it's present on the client or the server. This is a special case and should only be used if your mod has no server component.
# NONE means that no display test is set on your mod. You need to do this yourself, see IExtensionPoint.DisplayTest for more information. You can define any scheme you wish with this value.
# IMPORTANT NOTE: this is NOT an instruction as to which environments (CLIENT or DEDICATED SERVER) your mod loads on. Your mod should load (and maybe do nothing!) whereever it finds itself.
#displayTest="MATCH_VERSION" # MATCH_VERSION is the default if nothing is specified (#optional)

# The description text for the mod (multi line!) (#mandatory)
description='''${mod_description}'''
# A dependency - use the . to indicate dependency for a specific modid. Dependencies are optional.
[[dependencies.${mod_id}]] #optional
    # the modid of the dependency
    modId="forge" #mandatory
    # Does this dependency have to exist - if not, ordering below must be specified
    mandatory=true #mandatory
    # The version range of the dependency
    versionRange="${forge_version_range}" #mandatory
    # An ordering relationship for the dependency - BEFORE or AFTER required if the dependency is not mandatory
    # BEFORE - This mod is loaded BEFORE the dependency
    # AFTER - This mod is loaded AFTER the dependency
    ordering="NONE"
    # Side this dependency is applied on - BOTH, CLIENT, or SERVER
    side="BOTH"
# Here's another dependency
[[dependencies.${mod_id}]]
    modId="minecraft"
    mandatory=true
    # This version range declares a minimum of the current minecraft version up to but not including the next major version
    versionRange="${minecraft_version_range}"
    ordering="NONE"
    side="BOTH"

# Features are specific properties of the game environment, that you may want to declare you require. This example declares
# that your mod requires GL version 3.2 or higher. Other features will be added. They are side aware so declaring this won't
# stop your mod loading on the server for example.
#[features.${mod_id}]
#openGLVersion="[3.2,)"
フォルダの事前用意
「java/com/(作者名)/(ModのID)/resources」の中にフォルダを作っておきます。
resources
┣ assets
┃ ┗ (ModのID)
┗ data
┗ (ModのID)
「assets」はこのMod用のリソースパック、「data」はこのMod用のデータパックになっていて、中身もバニラのものとほとんど同じ作りになります。
つまり、これらの中身で分からないところがあれば、Modとか関係なしにリソースパックとかデータパックとかの作り方を調べたほうがいいということ!
マイクラを起動して確認
一度試したときと同様に、VSCodeで「実行とデバッグ」から起動してみます。